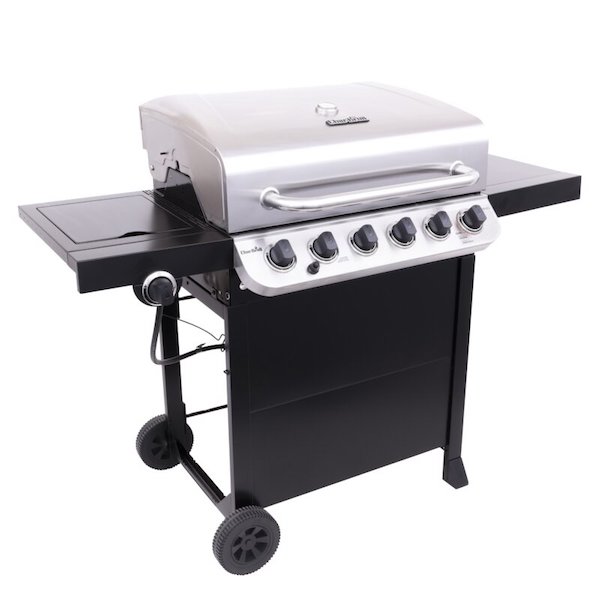

Assembling a grill may, at first may seem a bit undoable or difficult at first but with the right help , it can be made easy. With this guide, we will help you by providing you will all the necessary information such as tools needed, steps required, precautions and even some common questions brought up by customers.
Why Our Guide is Helpful
This guide is tailored for those who want a hassle-free grill assembly experience. We will outline the necessary tools and supplies, preparations to ensure a smooth assembly, and clear, step-by-step instructions. Whether you’re a seasoned DIY enthusiast or a first-time assembler, this guide aims to simplify the process and enhance your confidence.
Tools and Supplies Needed
Before you dive in, gather the following tools and supplies to make the assembly process as smooth as possible:
- Tools:
- Screwdriver (both flathead and Phillips)
- Wrench or adjustable pliers
- Level (to ensure stability)
- Measuring tape (for accurate alignment)
- Safety gloves (to protect your hands)
- Supplies:
- Grill assembly kit (check the box for all included parts)
- Oil for lubrication (if needed)
- Cleaning cloth (for wiping down parts)
Steps to Assemble Your Grill
- Read the Manual: As most good tutorials would suggest, you must read the manual of the grill first. Every grill is different depending on the manufacturer. Thoroughly read your manufacturers instructions as they will help you the most.
- Prepare Your Workspace: Pick some clean and large area such as a work table to lay out all the different parts, screws and equipment that will be required to complete this assembly.
- Assemble the Base: You should begin by assembling the base.. Use your screwdriver and wrench to secure the legs. Make sure they are tightly fastened as a stable base will ensure your grill is safe to prepare your feast at.
- Attach the Body: Now with the help of a friend or family member, lift up and attach the body of the grill over the base. Using a level to ensure that the body is balanced is highly recommended. Adjust as needed.
- Install the Grates and Burners: Now, position the burners as mentioned in the manual, this step varies from grill to grill so you must pay attention to the information provided on the manual.
- Check Connections: This step is only for gas powered grills. You need to check for leaks or any loose connections. Use a mixture of soapy water to check for any bubbling at the joints; if you see bubbles forming, tighten the connections immediately. Safety is key, take your time with this step so we can ensure safety.
- Final Adjustments: After assembling the grill, as good practice, you should check if all screw, bolts and connections are firm. And fix if anything is even slightly off place as it would affect your usage.
Why Choose The Handy Geeks?
At The Handy Geeks, we recognize that your time is valuable, and taking on a DIY project can sometimes be overwhelming. Our team of experienced technicians is ready to assist with your grill assembly, ensuring that it is set up correctly and safely. Choosing our services means you’ll have a reliable partner to take the stress out of your home improvement projects. With our expertise, you can focus on what really matters—enjoying great food and memorable moments with loved ones.
You can check our all 5-star review google maps page.

Here’s our phone number : +1 818-835-0556
Submit your request for assembling a grill here by filling the form. You can look at our other services and their forms here
FAQs
Q: How long does it typically take to assemble a grill?
A: Most grill assemblies take about 30 minutes to 1 hour, depending on the complexity of the model.
Q: Do I need any special tools?
A: You don’t need any special tools in most cases. A screw driver and wrench should suffice.
Q: Can I assemble a gas grill myself?
A: It is a lot easier than it may seem, just follow your manufacturer’s manual closely and ensure all connections are tight. But you may call professionals, like us, in case you don’t want to go through the work.
Q: What should I do if I lose a part?
A: Contact customer service of the manufacturer you got your grill from, in most cases it should help. But you could find replacements in related stores too.
Q: Is it necessary to lubricate the parts during assembly?
A: It is not always necessary but lubricating certain parts just makes the process smoother.
Conclusion
These instructions provide a straightforward approach to assembling your grill. Always refer to the manufacturer’s manual for specific installation methods and hardware recommendations, as individual grills may have unique features or requirements. If you find the assembly process too challenging or simply want to enjoy grilling without the hassle, consider reaching out to The Handy Geeks for professional assistance. Enjoy your grilling experience and the tasty meals that await you!

